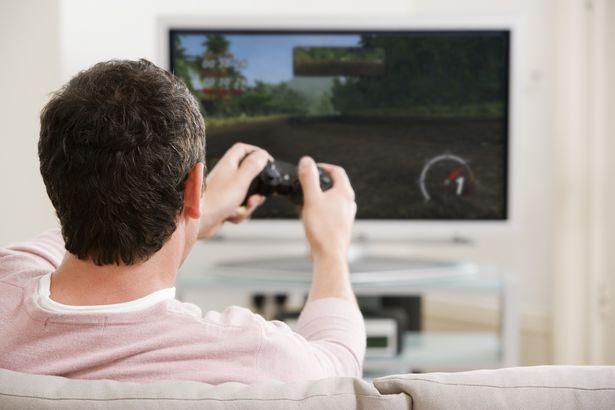
The Ps3 Move is a motion controller that enables you to target components of games with more precision, and its particular front includes standard face buttons forced to navigate menus and also other non-motion compatible interfaces. It isn't the ideal device for controlling video playback, you should use the Move controller to fast-forward videos playing on the PlayStation3. Instructions 1. Press the "Select" button to the side of the Ps3 Move Gun to spread out film Options menu. 2. Operate the directional pad to decide on the "Skip forward" icon. 3. Press the "X" button to commence fast-forwarding and press "Left" about the directional pad to avoid fast-forwarding. To rewind, press "Left" for the directional pad to start rewinding and press "Right" to prevent rewinding. Tips on how to Meet up a PS3 With Move jklzaeqc 1206 The PlayStation Move uses advanced motion control and tracking capabilities to present the gamer additional control over their virtual avatars, compared to the traditional computer game controller. PlayStation Move works exclusively while using the Ps3 video gaming system and some minor setup and calibration before use. The Ps3 Move Charger tracks a user's movements via internal sensors in the controller and the light located at the front of the controller. The PlayStation Eye Camera becomes necessary to use while using the PlayStation Move and it is sold separately. Instructions 1. Charge your Ps3 Move Controller by plugging inside the mini-USB port to the controller along with the USB port into your PS3. 2. Insert the safety strap to the PlayStation Move by threading the small end of the strap over the loop at the bottom from the controller. Tuck the larger end from the strap in-between the smaller strap and pull to tighten the strap. 3. First turn on the PS3 system and maintain the USB cable plugged in. Press the "PS" button within the PlayStation Move controller to pair the controller using the PS3 system. Each PlayStation Move controller ( http://www.vdealbox.com/ps3-accessories/ps3-move-accessories.html ) ought to be followed by the PS3 before your first utilisation of the controller. 4. Set the PlayStation Eye Camera towards the wide-angle view by turning the lens of the camera clockwise. Align the lens-angle marker with the blue-lens angle indicator on the camera. Connect the attached USB cord for the PlayStation Eye Camera with a USB connector within the PS3. You could possibly be positioned either at the pinnacle-center or bottom-center with the television.
Building rc cars radio often known as RC cars ( http://www.vdealbox.com/children-games/remote-control-helicopters-cars.html ), is usually a time-tested family tradition. In point of fact, you are able to assign kids tasks to try and do to make certain we all have a chance to construct some your vehicle. Once the project is done, it is possible to accept it outside and race it about the neighborhood showing off your hard work. Instructions 1. Purchase an electrical radio controlled cars that has body, electric engine, chassis, remote and receiver. Unpack the kit using a clean workspace separating out screws and nuts into small bowls matching like sized items. 2. Start the assembly with the chassis and adjoining parts following all included instructions. Screw down all joining parts tightly. Take care not to use an excessive amount of force so that you can not strip the threads. For screws that fit tightly or will not thread smoothly, apply a small amount of soap for the area and screw threads. Soaping stubborn screws will help with tightening with no danger employing a lot of force. 3. Locate and grease every part that spin, rotate, pivot and turn. Grease lightly as excessive may cause build minimizing performance in power. By using a lighter oil-based lubricant like WD-40 creates a superb alternative to popular heavier grease. The lighter oil enables parts to use smoothly longer devoid of the mess and buildup. 4. Find a proper destination for a mount the receiver box on the chassis. This location ought to be faraway from quick gears, the engine and areas that heat. Tightly secure the receiver box towards the chassis. Fill in the lamp and gaps across the experience of foam rubber to aid with heavy vibration. Receivers are given to interference when around other electric sources like engines. They're also at risk of interference when suffering from extreme numbers of vibration. jklzaeqc 1204 5. Wash all limbs with warm, soap and water before painting. Dry off with lint-free cloth completely. Prepare the splash of paint you can be applying. Apply the beds base color first, build up the accents. Tape off areas with painter's tape to stop paint in spots or even make sharp lines like racing stripes. Allow all paint to dry before finishing the assembly. 6. Finish the build by attaching all parts towards chassis tightly. Cover with the body and screw into place. Double check all wiring and connections. Insert battery pack and test the electronics, being confident that the receiver is answering and adjusting the remote quickly and properly. Consider the remote controlled cars out to a designated smooth road and test its performance and handling, making note of any tweaking you might need to make later later on.
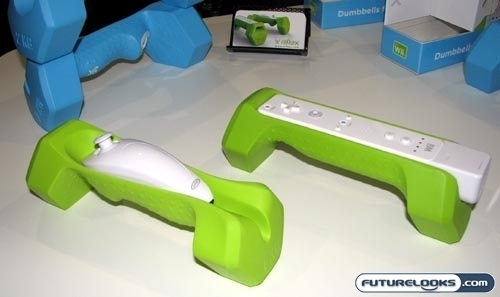
There are video game accessories linked to the Wii, a youtube video gaming console manufactured by Nintendo. Some of these accessories are game enhancements who are not necessary for gameplay. Others, including controllers and connection cables, are needed to operate the Wii. Controllers The typical Wii controller that provide most consoles is often a thin, hand-held device that detects motion. The attachment video game controller because of this controller such as a protective jacket and a wrist strap to ensure security. Wii gamers can also use traditional "button" controllers based on what the game requires. jklzaeqc 1203 Game-Specific Items A steering wheel video game accessories store pays to in racing and driving games. The Wii Zapper accessory can be utilized with specific shooting games. For Wifit players, the Wii Balance Board is really a necessary accessory. The board senses anyone's movements as well as can serve as a scale in order to the participant's weight loss. Connectivity Lots of the video game controller accessories necessary to connect the system are as part of the console package. The Wii component video as well as a/V cables connect the console to your television. The LAN adapter enables Internet connectivity. The AC adapter provides chance to the console. These necessary video game accessories ( http://www.vdealbox.com ) can also be bought separately through various outlets.
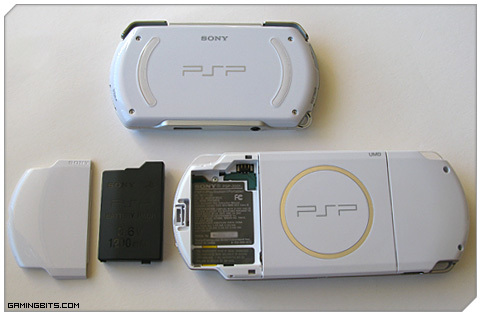
The Sony PSP, or PlayStation Portable, is really a portable game device that was released in 2005. In the past, the PSP continues to be updated with better hardware and better software. The PSP 3000 was the third relieve it Slimmer and even more compact as opposed to origina, the PSP 3000 incorporates a much clearer screen. Such as the original version, the PSP 3000 enables firmware for being downgraded if you use a unique service tool referred to as a Pandora psp 3000 battery. Switch off your Sony PSP and take away the battery and memory stick from your PSP. Insert the orlando magic memory stick into your PSP memory stick reader. Insert the Pandora battery in to the PSP battery bay. The PSP will automatically start and will also be in service mode. Press the X button twice to commence the downgrade process to your PSP's firmware. Press the X button once again to seal down your PSP after the process completes Eliminate the Magic memory stick and Pandora battery out of your PSP. Reinsert your normal battery and memory put in the PSP. Start up your device--it is best to have a downgraded PSP 3000. The way to Turn My psp 3000 charger Right into a Datel Tool The Sony PlayStation Portable (PSP) works on the special battery called a service tool to put the PSP into service mode. Another reputable name the service tool is Pandora battery or Datel tool. Almost all the same product, but merely have different names. The service tool means that you can install custom firmware on your PSP. This opens up many additional features, like playing full games on the PSP memory stick. jklzaeqc 1127 Download the Ultra Pandora Installer program with the PSP (see Resources). Connect your PSP on your computer with the USB cable and choose "USB Connection" on the PSP main menu. You have having access to your PSP memory stick from the computer. Right-click on the downloaded application and then click "Copy." Go into the PSP memory stick in the computer and open the "PSP" folder. Right-click on the "GAME" folder and click "Paste." Press the "O" button on your own PSP to disconnect it out of your computer. Select Ultra Pandora Installer from the game a part of the PSP main menu. Select "Battery Options" on the menu that appears. Select "Make Battery Pandora" and "Yes" to verify deciding. Wait as the psp 3000 battery ( http://www.vdealbox.com/psp3000-accessories/psp3000-battery-charger.html ) is converted to a Pandora battery. Select "Exit" in the event the process completes. You will end up cut back for your PSP main menu. Your battery is something tool battery.
The Nintendo ds lite Lite can be a portable xbox that competes with Sony's PSP and has two LCD screens with one like a touchscreen. If the power button is malfunctioning, each of the features for instance gameplay, Wi-Fi and touch-screen functionality won't operate. Fortunately, which has a replacement on / off switch, you possibly can replace the power button and never have to check out a repair shop. Instructions 1. Eliminate the seven screws on the bottom in the Nintendo ds lite Lite while using Phillips screwdriver. 2. Remove the back with the dsi case from the Ds lite gently. Don't let the volume knob emerge. jklzaeqc 1123 3. Eliminate the the broken power switch out from the DS Lite with wire cutters. De-solder other switch's connections from the motherboard. 4. Put the replacement power switch into the empty space within the motherboard. Solder it in to the six points about the motherboard. 5. Replace a corner dsi cases with the Nintendo DS Lite and fasten the screws on it with all the Phillips screwdriver. How you can Modify Your Nintendo DS The Nintendo DS could be the successor on the Game Boy, the initial portable device series by Nintendo to get worldwide fame. With 135 million DS devices sold worldwide since February 2011 in support of many colors, many owners may choose to modify their device that has a skin. Beyond personalization, skins also protect true from buffs and scratches. Finally, when you finally become tired with a skin, you'll be able to replace it with another without worrying in regards to a sticky mess. Instructions 1. Wipe off any debris or dust on the Ds lite with a clean rag. 2. Eliminate the backing from the front exterior area of skin. Align it around the outer cover with the Nintendo DS after due thought. Carefully lay it down, running your finger along it in order to avoid creating air bubbles. Repeat while using back area of your skin. 3. Open the DS and apply the highest interior percentage of the epidermis. Do not stick the epidermis towards screen. 4. Apply the ultimate percentage of the epidermis for the lower interior from the Nintendo DS. Take special care with this particular quarter seeing as there are numerous buttons and another screen.
Breaking the dsi xl case in your Nintendo ds lite could be frustrating, but as much as harm to a Nintendo system goes, fixing a broken case is relatively cheap. Unlike internal damage, which in turn renders it useless, a broken case may be replaced, preventing you against requiring you to obtain a new unit. In case you have broken the situation with your Nintendo ds lite, but the system still works properly you'll be able to send the machine in for repair or else you are capable of doing it yourself. Instructions 1. Cover your work surface with a soft covering such as a face towel. Lay the Nintendo ds lite facedown on the towel. 2. Peel the rubber pads through the back of the unit. If you possibly could’t get them program your fingers, you can use the tiny screwdriver to pry the pads up. 3. Exclude the screws on the back from the unit. The converter should have four screws holding it together: the one which holds in the battery inside lower right corner, one around the card slot and two on the left-hand side on the unit. 4. Take away the battery from your unit. Take away the screw in the battery compartment and lift off the quilt the screw was holding constantly in place. jklzaeqc 1122 5 . Lift a corner cover off the unit carefully once all of the screws are actually removed. Don’t pull too much, since the unit is attached by a few cables. Note the spot that the cables are connected to the rear case and carefully pull the end with the cables to clear out them from the back cover. 6. Unscrew the screws which can be holding the buttons about the front on the unit available. Support the black flap above the directional pad and pull the wire attached underneath the flap off the casing. 7. Detach the energy indicator by pulling left on the wire while sliding the casing toward the proper. The wire should slide beyond case plus the bottom level of the front in the case should come free, leaving the top, front perhaps the dsi xl cases in position. 8. Slide the wire about the left side of the top 1 / 2 of true from the casing. Lift the ring about the right side out from the case. This certainly will expose four rubber pads about the back from the screen. 9. Peel away the rubber pads to reveal four screws. Eliminate the screws at intervals of corner of the screen. 10. Keep the casing on spare on both of the screen and slide the casing up from the unit. The way it is should remain attached by a wire. Pull the wire left and push the casing directly to detach the wire from the casing. 11. Return back from the procedures in reverse order to collect the modern Nintendo dsi xl case ( http://www.vdealbox.com/dsi-xl-ll-accessories/dsi-xl-ll-housing-case-cover.html ) over the internal the main unit.
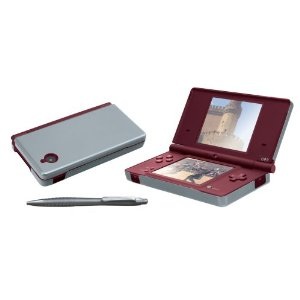
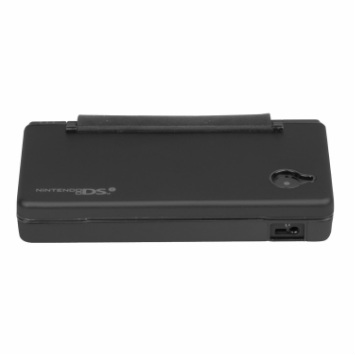
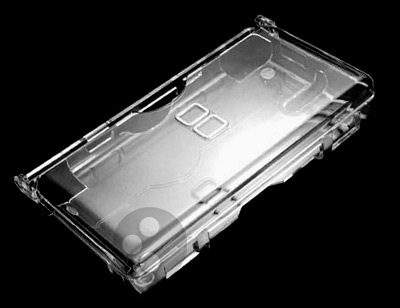
Product Features Color: Black DSi case that has a brilliant aluminum exterior Play-Thru design: play games while product is protected in the event that Officially Licensed by Nintendo. 100% Authentic POWER Something For sale in Black, Silver, Teal Blue and Green Product Description Color: Black Form meets function for that Nintendo DSi with this particular sleek Guard Case. The brilliant aluminum exterior, available is black, silver, teal blue or green, enhances the sophisticated styling in the case. Play-Thru design means you don't need to remove your game system to gain access to the camera function or other buttons and ports! Get maximum protection in a minimalist silhouette using this POWER One hundred% Authentic Guard Case, Officially Licensed by Nintendo Nintendo DSi game system sold separately. I purchased this example when I purchased my DSi. Im undecided that this finishes are with other DSi's, even so the matte finish about the black one practically begs being scuffed up. Without a doubt, this example has awesome quality! The photographs dont do along with justice! The way it is incorporates a metallic green for it, lighter than the images show, the DSi fits very snugly into your case, the black flip above the way it is you see includes rubber unlike some that just use cheap hard plactic. It doesn't only protect your DSi, however in my estimation, it vastly improves the visual appeal of it! Should you buy this, or any kind of its multi-colored brethren, you wont be disappointed. If you're searching for a not too bulky and comfortable guard case for the DSi, next the Play-thru case may be the someone to get. The way it is is constructed from two parts, plastic and aluminum. The outdoors shell, that is silver in such cases, is glued towards black shell in the case, which can be plastic. The truth itself snaps onto the system PERFECTLY, so dust will never enter spaces left by silicone cases or cheap Chinese manufactured cases. I'd personally repeat the case would protect from your fall through the pocket or hand, but damage might be afflicted somewhere itself if dropped from your two story building onto concrete ground. When you have averaged sized hands or big hands, the truth adds handful of bulk for the DSi, making it easier to hold on to(Many people feel). The DSi while using case on will still easily fit into your pocket.(Not girl jeans though, obviously). I propose silver using a white DSi. Really the only con I ran across in cases like this was because you can't charge the system with all the case on. The silicone covering the top perhaps the system will push the wire downward, which may result in the wire to snap combined with chip inside the DS. Achievement a Con for me personally because I never play while charging my ds. jklzaeqc 1121 I ordered this case to own something to defend my dsi from fingerprints, scuffs, etc. This case definitely protects, while adding a nice metallic green color. They can fit the dsi perfectly as well as the ports are easily accessible. It can be aluminum on the outside of, hard plastic on the inside, and possesses an accommodating rubber hinge. It adds a reasonable number of weight for the dsi itself, but for the reason that it can be aluminum. The hinge seems strong, unlike a lot of unlicensed dsi cases. We have nothing bad to say about this case, they can fit the dsi perfectly! Bottom line: Should you be looking for something which will protect your dsi from scuffs and scrapes, this really is one to take into account. Adhere to what they you are looking for an incident that could increase the protection, I might choose a type of full dsi cases that zip about the dsi itself. Personally I dislike requiring you to take my dsi out from the case and that i LOVE earn money can engage in my dsi using this DSI case( http://www.vdealbox.com/dsi-accessories/dsi-housing-case-cover.html ) still on.
“Pokemon Platinum” is a version of the popular role-playing game series allowing you to definitely train pokemon creatures to fight other pokemon to receive rewards. The “Platinum” version of the game is for the Ds lite portable console, many scenarios amongst gamers need tap the bottom touchscreen from the DS using your stylus pen. In the game it's also possible to collect items, like clothes, for ones pokemon make use of when competing in fashion contests. To compete over these contests, you should employ the style ds lite case. Instructions 1. Walk to Jubilife City and get the Poketech App on the president from the Poketech Company inside the ground level of the building located on the northwest on the town. jklzaeqc 1120 2. Complete the battle contrary to the two Team Galactic trainers. A guy will walk your choice and invite someone to the Jubilife TV center. Additionally , you will obtain fashion case. 3. Press the “X” button to spread out the key menu, and you ought to see the fashion ds lite cases. In case you tap on the case, you won’t have the ability to open it. Tap the “Exit” button revisit the experience. 4. Go to the TV station in Jubilife City and walk as much as your second floor. Climb towards character with the camera and press the “A” button approach him. You will then be prompted to go in a fashion contest. 5. Press the “A” button to go in the contest. You'll be prompted to pick out any clothes item from the fashion ds lite case ( http://www.vdealbox.com/ds-lite-accessories/ds-lite-housing-shell-case.html ), and you must then purchase a pokemon to don the garments.
Kids today carry their Nintendo DSI using them everywhere -- the mall, restaurants, flights, trips and seemingly everywhere involving. Many parents purchase ready-made cases to shield the DSI from getting broken or damaged, but if you need a one-of-a-kind accessory that reflects your son or daughter's personal style, consider sewing an incident for your Nintendo DSI. The choices are endless. You can choose fabric depicting popular sports team, childrens favourite plus much more. Instructions 1. Measure the the circumference in the DSI while it is closed, from your front latch towards the hinges and back around on the latch and add 2 ½ inches. Then, measure its width and add 1 ½ inches. 2. Fold the material in half lengthwise, right sides together and selvages aligned. jklzaeqc 1119 3. Work with a fabric marker or chalk to attract a rectangle, that could function as the dsi case, directly on the rear of the pad. Mark the width on the fold toward the sides. Cut two of the rectangles. 4. Utilize a fabric marker or chalk to draw a 7-inch line through the fold to the correct and then an 8-inch vertical line. This piece will function as a flap to seal true. Cut two. 5. Fold the cotton batting in two lengthwise. Cut one rectangle on the same dimensions because fabric to the DSI case. 6. To assemble the flap, center and stitch the hook side in the Velcro onto the right side in the flap piece, 1 inch through the base. 7. With right sides together, pin the flap pieces with raw edges aligned, and stitch a ½ seam three sides, leaving the most notable edge open. Clip the corners, turn the flap right side out, and press. 8. Lay the two fabric rectangles for the DSI case with wrong sides together along with a layer of batting totally. Pin through all three layers and employ a disappearing fabric marker to mark with fabric with quilting lines. Diagonal lines about 2 inches apart work nicely. 9. Occurs machine to quilt the layers together following the lines. 10. Determine which side is definitely the not in the dsi cases and fold the quilted material by 50 percent by bringing underneath nearly the most notable, wrong sides together, matching raw edges. Measure 4 inches from the top edge, center the loop Velcro and stitch it in situ. 11. Fold the quilted material in two again, now with right sides together. Pin and stitch them from the rectangle utilizing a half-inch seam. Leave the highest open. 12. Trim the seam allowances and bind them the purchased bias tape, fully encasing the seam. Turn the sleeve right side out. 13. With right sides together and raw edges aligned, pin back the flap towards center in the sleeve. Baste in place. 14. Use double fold bias tape to complete the raw edges with the the surface of the sleeve.
The "Zumba Fitness" game with the PlayStation 3 entertainment method is an exercise and fitness title from developer Pipeworks Software and publisher Majesco. "Zumba Fitness" uses the ps3 move charger station motion control remote system add-on to the PS3. There are a variety of common PS3 and PlayStation Move issues that can impact the performance in the "Zumba Fitness" game and require troubleshooting. Instructions 1. Look at the audio/video connection in the back of the PS3 if you find no car stereo output on your TV. This cable includes the body which is consists of two teams of three prongs. Each prong is often a different color. You will discover ports for these prongs both about the back of the PS3 along with the back of your TV. These ports are colored exactly like the prongs. Ensure the prongs are matched correctly with the ports. jklzaeqc 1116 2. Get a new video input on the PS3 if your "Zumba Fitness" title still is not outputting audio and video. There is an "Input" button near the top of the remote. Press this multiple times to cycle through your TV's available inputs. Only 1 on the available inputs is associated with the PS3, and if another input is selected the audio and video for that PS3 and "Zumba Fitness" will fail. Continue pressing the input button. Audio and video for "Zumba Fitness" will immediately be restored if your correct input is selected. 3. Look at the positioning with the ps3 move controller charger if you experience car stereo output though the motion control elements along with your Move controller are certainly not responsive. Ensure it hasn't fallen over and ensure it's pointed toward you and is elevated started. 4. Check the batteries of your respective ps3 move charger should the "Zumba Fitness" game continues to be not responding. Slide it cover journey back with the controller and take away the old batteries, replacing all of them with new "AA" batteries.
|

 RSS Feed